Lights
Suggested Supplies
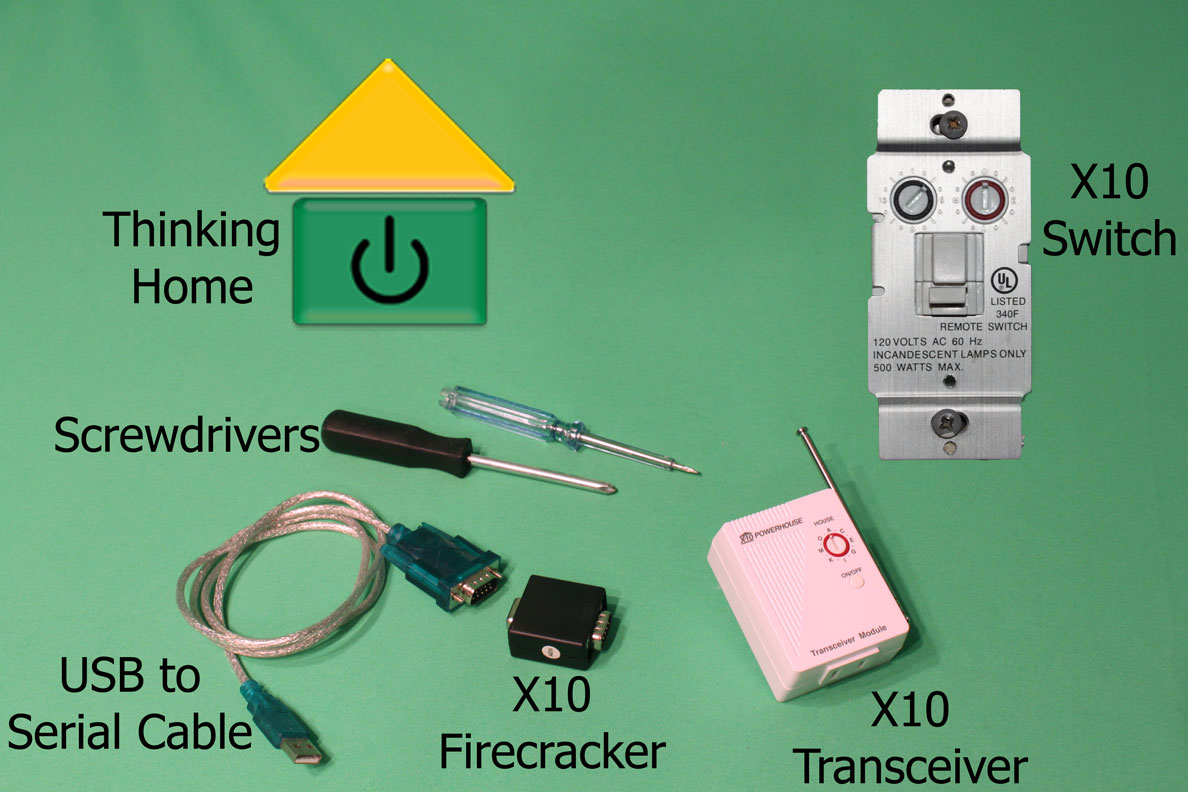
- Computer
- X10 Control software
- USB to Serial cable
- X10 FireCracker
- X10 Transceiver
- X10 Switch
- Screwdrivers
Note: As a reminder, some of the supplies on this list can be changed to some degree to obtain the same result. USB X10 controllers can be used instead of using the USB to Serial Cable and X10 Firecracker, but, as previously stated, the items listed here are used as the standard example. Also, this is the first mini-project that deals with wiring, so be sure to use caution when working with electricity.
First, turn OFF the electricity to the selected light switch. To make sure the correct circuit has been disabled, turn the light ON before turning off the breaker switch. Next, use a screwdriver to remove the cover for the switch that will be replaced. Then, remove the switch, and replace it with the new X10 switch. Instructions should be included for wiring, as the different switches will vary. Before putting the cover over the new switch, turn the power back ON, and test the new switch to make sure that it works electrically and manually.
If that works, the computer controlled side can be set up. First, connect the USB to Serial cable to an unused USB port. Then, connect the X10 Firecracker to the Serial Cable, and install the X10 Control Software on your computer. For Mac users, Thinking Home is the recommended software because it is compatible with Firecracker. Next, plug-in the X10 Transceiver into an unused electrical outlet. X10 devices use two address settings to keep from interfering with each other. Set the letter on both the transceiver and the switch to the same setting, such as "A", and set the numbers to different settings like "1" for the transceiver and "2" for the switch. If Thinking Home is being used, add the X10 switch with the address "A2". Once that is completed, the X10 switch should show up in the installed hardware list. Right click the device, and click “Turn ON”. At this point, the light should be ON.